-
Getting Started
-
Profile Management
-
Document Management
-
Admin Support
-
Configure 2FA
Uploading Documents
Overview
The Upload function allows you to add individual files to the system, but it does not support uploading entire folders. This is intentional: the module already includes full sub‑folder management, so you can navigate into any specific sub‑folder and upload files directly where they belong. This ensures a cleaner organization, prevents accidental bulk uploads, and keeps folder structures easy to maintain.
Accessing the Upload Function
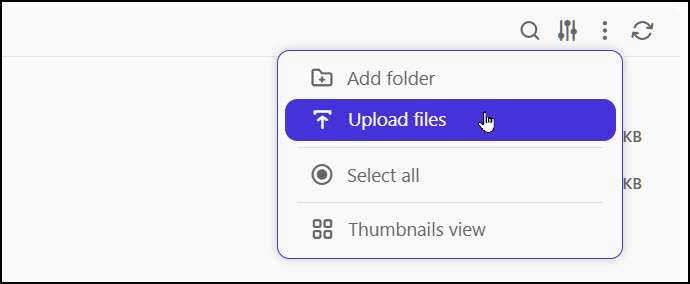
The UPLOAD function is available from the More Actions menu. To access it, open the folder where you want to add files, then select More Actions and choose Upload files from the list of available options.
Once selected, the system will open the file selection dialog, allowing you to browse your device and choose the files you want to upload.
Uploading Files Step‑by‑Step
Navigate to the specific folder or sub‑folder where the files should be stored.
Select More Actions.
Click Upload files.
When the file selection dialog appears, choose one or more files from your device.
Confirm your selection to begin the upload.
Wait for the success message indicating the files have been added to the folder.
Why Only Files Can Be Uploaded
The UPLOAD function supports individual files only. Uploading entire folders is not available because the module already includes full sub‑folder management. You can simply open the desired sub‑folder and upload files directly into it, keeping your structure organized and easy to navigate.