-
Getting Started
-
Profile Management
-
Document Management
-
Admin Support
-
Configure 2FA
Directory Overview
Overview
This article explains how to upload documents within the system, including supported file types, size limits, and troubleshooting tips. Use this guide whenever you need to attach files for processing, storage, or sharing.
After logging in successfully, the user is automatically redirected to the File Directory page. This serves as the central hub for managing all uploaded documents, including viewing, organizing, and performing actions such as editing, downloading, or deleting files.
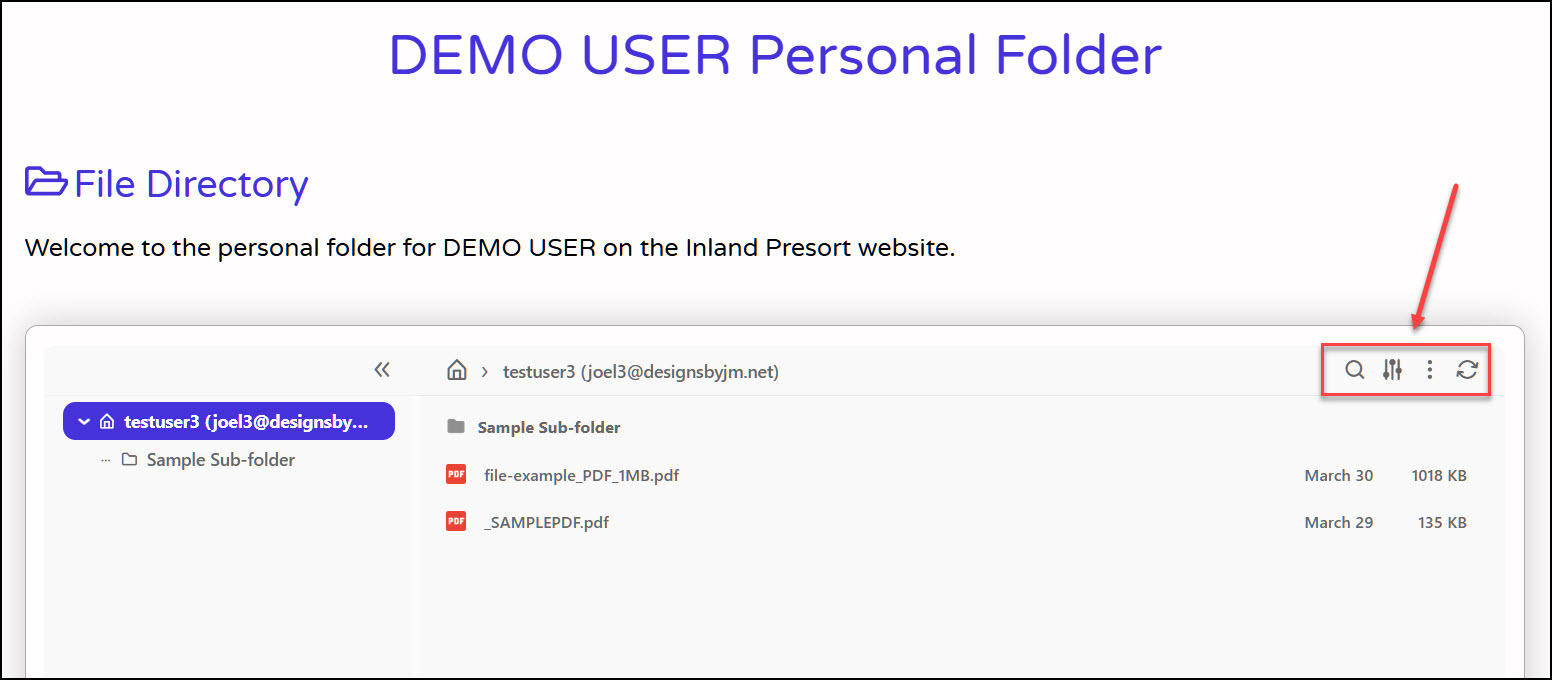
ICONS / ACTIONS
Search
Use the Search icon to quickly locate files within your current directory or any of its sub‑folders. This tool helps you find documents without manually browsing through each folder.
The search bar filters results based on the current root folder you are viewing.
It automatically includes all sub‑folders beneath that root, so you can search deeply without navigating into each folder manually.
Sort
Use the Sort action to organize your files in the way that’s most useful to you. You can sort the file list by Name, Size, Date Modified, or Date Created, and each option can be toggled between ascending and descending order.
More Actions
The More Actions menu provides additional tools for organizing and managing your files. These options help you create new folders, upload documents, select multiple items, and switch between different viewing styles.
[ Add Folder ]
Use Add Folder to create a new directory within your current location. This is helpful for organizing documents into categories, projects, or date‑based folders.
How it works:
- Click More Actions → Add Folder.
- Enter a name for your new folder.
- Click Create to add it to the current directory.
Tip: Choose clear, descriptive folder names to keep your workspace organized.
[ Upload Files ]
The Upload Files option lets you add new documents directly into the folder you’re currently viewing.
How it works:
- Select More Actions → Upload Files.
- Choose one or more files from your device.
- Confirm the upload and wait for the success message.
Notes:
- Files are uploaded into the current folder.
- Supported file types and size limits depend on your system settings.
[ Select All ]
Use Select All to quickly highlight every file and folder in the current directory. This is especially useful when performing bulk actions such as deleting, moving, or downloading multiple items.
How it works:
- Click More Actions → Select All.
- All visible items become selected and ready for your next action.
|Tip: You can deselect items individually if you don’t want to include everything.
[ Thumbnails View ]
Switch to Thumbnails View to display files—especially images—in a visual grid layout. This makes it easier to identify documents by preview rather than by file name.
How it works:
- Choose More Actions → Thumbnails View.
- The directory switches from a list layout to a grid of image previews.
Best for:
- Image-heavy folders
- Visual browsing
- Quickly spotting the right file without opening it
Refresh
The Refresh action updates the contents of the current directory to ensure you’re viewing the most accurate and up‑to‑date information. This is especially useful when multiple users are working in the same workspace or when files have recently been added, removed, or modified.